
Faces are the most complex structures to sculpt because even
the simplest expression consists of many planes and valleys,
ridges and indentations. The best book of facial expressions
for the artist I have found is called "The Artist's Complete Guide
to Facial Expression", by Gary Faigin. It has a wealth of examples
of various faces drawn in all manner of expressions. It would
be a great addition to any figurative sculptors reference library.
For this little tutorial I'll just stick to a smile.
As important as scale is to figurative sculpture, when you are doing
fantasy work it's quite all right ( actually it's kind of expected) to
take some artistic license with shape and scale. Often heads are
bigger and arms and legs are longer or shorter than scale to make a
point about the character. Brian Froud's faery illustrations are a
perfect example. He renders some characters with extreme
realism and others with hyper exaggerated head or limbs.
The face below is a young faery boy and will have a larger than
scale head and eyes. This accentuates his faery nature and youth
as well as makes the face easier to sculpt. Don't ever let anyone kid
you, sculpting smaller is much harder than sculpting large.
For this face I started with a small egg shape of compressed aluminum
foil, about 1/2" in diameter. I covered it with a layer of clay about 1/8"
thick and formed it into an egg shape with a chin.

Lightly scribe lines at the halfway points vertically and horizontally.
The eyes will sit on the horizontal half way mark. I make a hollow
indentation on either side of the center about one eye width apart
then press what ever eye I am using into it and press the clay up
around the eye. You can use glass eyes like the ones shown or
white glass beads or steel ball bearings. Whatever you like that
represents the eye and won't melt at clay curing temperatures.
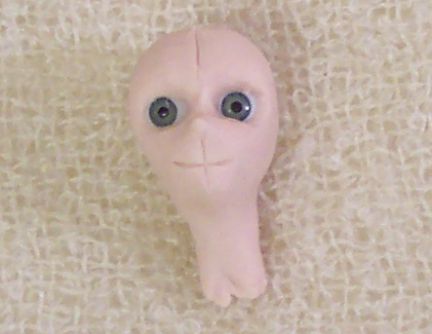
In the picture above I have inserted the eyes and then pinched and
pressed the clay into the beginnings of a nose. I also marked where
the mouth will be and started shaping the cheeks up a little.
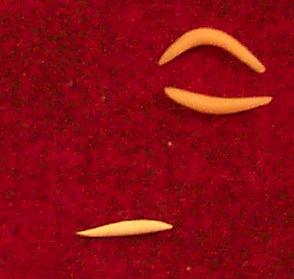
Above I've formed two snakes of flesh clay for the upper and lower
eyelids (please pardon the picture quality) The third small snake is
white clay for teeth and will be used later.
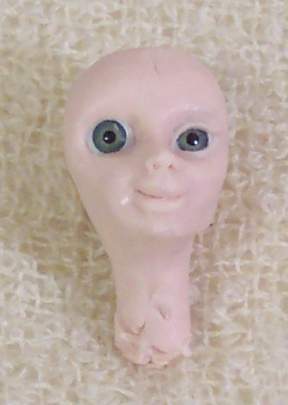
Here I've formed the two small snakes of clay into lids, above and
below one eye. These are smoothed and pressed into place. A thinner
eyelid looks more alert and a thicker lid covering more of the eye looks
more drowsy or comical. I've also begun to define the nose and lips.
I push the clay up and away from the lip area to form the creases below
the cheeks. The remaining mound in the lip area is pushed up into lip
shapes with a dental tool and the indentation below the lips that makes
the chin is formed. I do both sides of the features at the same time so
the face remains symmetrical.
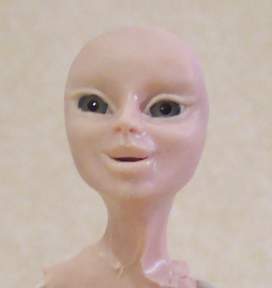
At this point I have placed the head on a wire armature extending
up into the foil through the neck to make handling easier. If you
are doing a full body sculpt you can start with the armature wire up
into the foil or slide the neck onto the wire later as I've done here.
If you are doing just a head, hands and feet to put on a cloth body
you can make a small (1/8") hole in the neck just before baking to
glue a body armature into later. Along the way I continually refine
the features whenever I look at the face. Each time you look at it from
a different direction you will see things to adjust. Smoothing a cheek,
deepening a crease, pushing slightly this way or that to bring the
features closer to what you have in mind. I don't think an exact
method for this can be taught, it's more a matter of training the eye
to observe more closely. Whenever you see a face in a magazine or
at the market you begin to make little observances. You might think to
yourself "Oh, that little indentation near the nose goes just so."
Observing reality from all different angles is the best teaching
you can have.
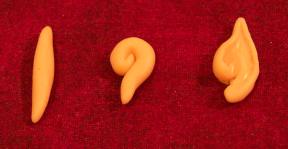
Here are the beginnings of an ear. I start with a fat little snake of clay
and coil it part way around. Then I take one of my small, spoon shaped
dental tools and smooth it up in the direction of a little pointed ear.
Because of their very small size, these ears don't have all the intricate detail
of a real ear but representing the curve into the ear at the front and the
groove around the outside help to make it more realistic. Once I have
two ears that match I place them on either side of the head and use a small
spoon tool to press the inside of the ear into the head, leaving the top and
back of the ear sticking out. If you look at a head from the side, the front
edge of the ear sits just about on the center line from front to back.
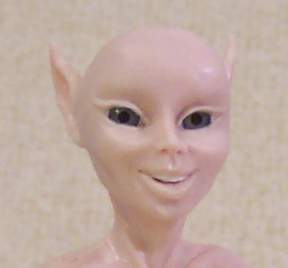
Now that his ears are placed and smoothed onto the sides of his head I start
refining his facial expression. I cut his mouth open and place the small
snake of white clay for his teeth at the top of his mouth. The edge of
an exacto knife works well to cut the separations between teeth. I will
continue shaping the lips back over the teeth and draw the sides up
into a smile. Now I will press the curve of his cheeks up a bit and the
corners of his eyes also to represent more of a smiling expression.
At this point I will set the face aside for a few hours or a day and come
back to it with fresh eyes to refine and assess the work done already.
In the case of this face I decided that I didn't like the look of his eyes so
I carefully cut a slit from the corner of each eye through the side of the
head and removed the glass eyes and replaced them with a slightly
smaller white glass bead. The eye socket needed a little clay bed to sit
the now smaller eye ball into so it would not be too sunken into the head.
Don't be afraid to do surgery like this if the face doesn't meet your
expectations. I try never to let anything go thinking it will do even if
I am not happy with it. Once the doll is finished that bit I didn't do my
best on will haunt me.
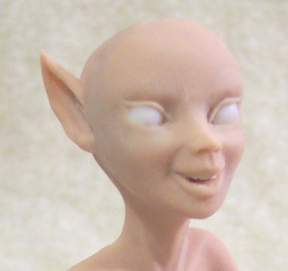
Once all the sculpting is finished and smoothed to the best of my ability
I take a small filbert paint brush with a very small amount of Sculpy
diluent and very gently brush over the surface of the face to remove
any tool marks. If you can, you should sit with the face in direct,
natural light for this. I sit right in front of a window with the light falling
evenly on both sides of the face. You will see many more marks to be
smoothed out this way and the quality of the finished face will really
show the extra care you took.